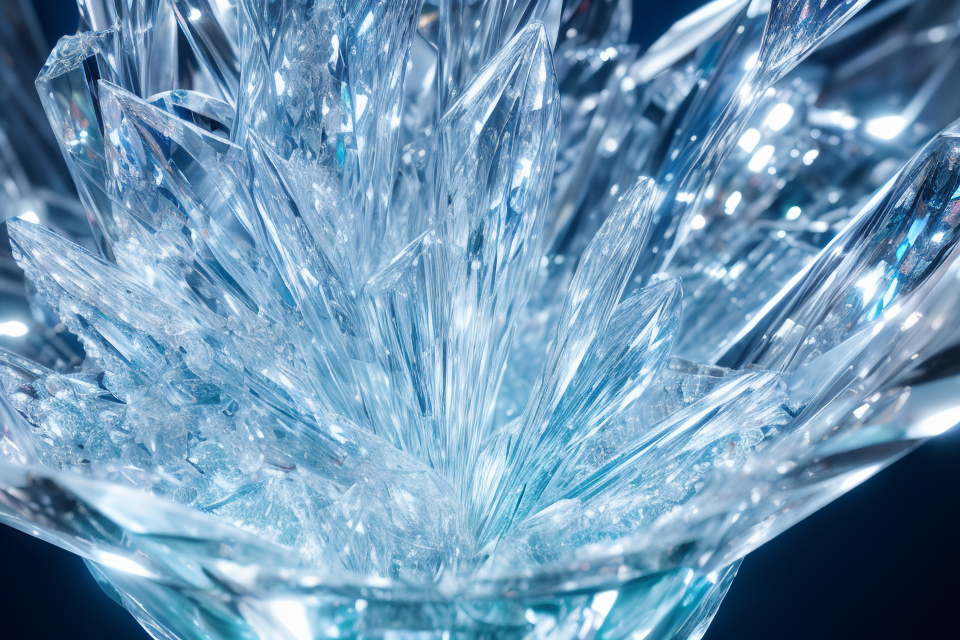
Crystal growing is a fascinating hobby that can produce beautiful and unique specimens. To get started, you’ll need to make your own crystal growing solution. This solution is the key to growing stunning crystals in your own home. In this guide, we’ll walk you through the process of making your own crystal growing solution step-by-step. From gathering the necessary materials to mixing and preparing the solution, we’ll cover everything you need to know to create your own crystal growing kit. So, get ready to embark on a journey into the world of crystal growing and discover the magic of creating your own crystal masterpieces!
What is a Crystal Growing Solution?
Components of a Crystal Growing Solution
A crystal growing solution is a homogeneous mixture of two or more substances that can dissolve or suspend a solute, in this case, a substance that will form crystals. The solution contains a solvent and a solute, which is the substance that will crystallize. The components of a crystal growing solution are essential for successful crystal growth, and they are:
- Solvent: A solvent is a substance that can dissolve other substances. It is the liquid in which the solute is dissolved. The solvent used in crystal growing solutions can be water, acetone, ethanol, or any other suitable liquid.
- Solute: A solute is the substance that dissolves in the solvent. In crystal growing solutions, the solute is the substance that will form crystals. Common solutes used in crystal growing solutions include salt, sugar, Epsom salt, and borax.
- Seed crystal: A seed crystal is a small crystal that is added to the solution to start the crystal growth process. It is usually made of the same substance as the solute and is placed in the solution before heating. The seed crystal provides a surface for the solute to crystallize on, and it helps to create more uniform crystals.
- Heat source: Heat is required to dissolve the solute and to promote crystal growth. A heat source, such as a hot plate or a double boiler, is used to heat the crystal growing solution. The heat helps to dissolve the solute and to increase the rate of crystal growth.
- Container: The crystal growing solution must be contained in a suitable container. The container should be clean and dry, and it should be large enough to hold the solution and any crystals that form. A glass jar or container is often used for crystal growing experiments.
In conclusion, the components of a crystal growing solution are essential for successful crystal growth. The solvent, solute, seed crystal, heat source, and container all play a vital role in the crystallization process. By understanding these components, you can create your own crystal growing solution and grow beautiful crystals at home.
Purpose of a Crystal Growing Solution
A crystal growing solution is a homogeneous mixture of two or more substances that, when combined, have the ability to form a crystal. The purpose of a crystal growing solution is to provide a controlled environment for crystals to grow. This environment is carefully designed to encourage the formation of high-quality crystals, which can be used for a variety of purposes, including scientific research, jewelry making, and decorative purposes.
In order to achieve this, the crystal growing solution must be carefully prepared and controlled. Factors such as temperature, concentration, and the presence of additives can all affect the growth and quality of the crystals. By carefully controlling these factors, it is possible to create a solution that is optimized for the growth of specific types of crystals.
In addition to its practical applications, crystal growing is also a popular hobby among enthusiasts who enjoy the beauty and fascination of watching crystals form. Whether you are a seasoned crystal grower or just starting out, having a basic understanding of the purpose of a crystal growing solution is essential for success.
Materials Needed for Making Crystal Growing Solution
Water
When it comes to making a crystal growing solution, water is an essential component. In fact, it is one of the most important materials you will need to create the perfect environment for your crystals to grow. Here are some details about the type of water you should use:
- Distilled Water: It is recommended to use distilled water for crystal growing because it is free from impurities and minerals that can interfere with the growth process. Tap water, on the other hand, may contain chlorine, fluoride, and other chemicals that can negatively affect the quality of your crystals.
- Filtered Water: If you cannot find distilled water, you can use filtered water instead. It is important to use a filter that removes impurities and minerals to ensure that your crystals grow without any interference.
- Lukewarm Water: It is important to use lukewarm water when making your crystal growing solution. Cold water can shock the system and prevent the crystals from growing properly. Lukewarm water is also less likely to introduce impurities into the solution.
- Deionized Water: Deionized water is another option for making your crystal growing solution. This type of water has had all of its minerals removed, making it a great choice for those who want to ensure that their crystals grow without any interference.
When making your crystal growing solution, it is important to use the right type of water to ensure that your crystals grow properly. By following these guidelines, you can create the perfect environment for your crystals to thrive.
Epsom Salt
Epsom salt, also known as magnesium sulfate, is a common ingredient used in crystal growing solutions. It is a white, odorless, and bitter-tasting compound that is often used as a dietary supplement. Epsom salt is readily available at most drugstores or online and can be easily added to your crystal growing solution.
It is important to note that not all salts can be used for crystal growing. Epsom salt is specifically recommended because it is easily soluble in water and can be easily sourced. Other salts, such as table salt or rock salt, are not soluble enough to be used in crystal growing solutions.
To use Epsom salt in your crystal growing solution, simply add the appropriate amount to your solution and mix thoroughly. It is important to follow the recommended guidelines for the specific crystal growing project you are working on to ensure that the solution is properly prepared.
Borax
Borax, also known as sodium borate, is a white, powdery mineral that is commonly used in crystal growing. It is a naturally occurring mineral that can be found in certain areas, but it is also readily available for purchase at most craft stores or online.
Borax has a chemical formula of Na2B4O7·10H2O and is a key ingredient in making a crystal growing solution. It is a strong oxidizing agent and can react with other chemicals to produce various colors and textures in the crystals.
When using borax for crystal growing, it is important to use a high-quality, pure form of the mineral. Impurities or contaminants in the borax can affect the growth and quality of the crystals.
In addition to borax, other materials such as water, Epsom salt, and string or wire may also be needed to create the crystal growing solution. The specific materials and ratios will depend on the type of crystal being grown and the desired results.
Overall, borax is a crucial component in making a crystal growing solution and can help produce beautiful and unique crystals for hobbyists and enthusiasts.
String or Pipe Cleaner
In order to make your own crystal growing solution, you will need a few basic materials. One of the essential items on this list is a string or pipe cleaner. These items may seem unrelated to crystal growing, but they play a crucial role in the process.
A string or pipe cleaner is used to suspend the crystal structure while it is growing. This allows the crystals to form in a specific shape, rather than just dropping to the bottom of the container. The string or pipe cleaner should be attached to the bottom of the container, so that the crystals can form in a vertical orientation.
When selecting a string or pipe cleaner, it is important to choose one that is thin and flexible. This will allow the crystals to grow without being damaged or distorted. Additionally, the string or pipe cleaner should be made of a material that is not reactive with the solution, such as plastic or nylon.
Once you have selected your string or pipe cleaner, you can begin the process of making your crystal growing solution. Simply follow the instructions provided in the recipe, and be sure to attach the string or pipe cleaner to the bottom of the container before adding the solution. With a little patience and attention to detail, you can create beautiful crystal formations that you can display or use in a variety of ways.
Steps to Make Your Own Crystal Growing Solution
Step 1: Measure the Water
Measuring the water accurately is the first step in making your own crystal growing solution. This ensures that the concentration of the solution is correct and the crystals grow evenly. To measure the water, you will need a measuring cup or graduated cylinder, which can be found at most science supply stores or online.
When measuring the water, it is important to use a clean container to avoid contamination. Fill the container to the desired volume using the measuring cup or graduated cylinder, and make sure to record the measurement accurately.
It is also important to use distilled water for crystal growing, as tap water can contain impurities that can affect the growth of the crystals. Distilled water can be purchased at most grocery stores or online.
Once the water has been measured, it can be mixed with the appropriate amount of crystal growing solution, which will be discussed in the next step. The solution should be stirred thoroughly to ensure that the crystals grow evenly.
In conclusion, measuring the water accurately is a crucial step in making your own crystal growing solution. It ensures that the concentration of the solution is correct and the crystals grow evenly. Using a clean container and distilled water, and recording the measurement accurately will help in the process.
Step 2: Add Epsom Salt
Once you have prepared your container and solution, the next step is to add Epsom salt to the solution. Epsom salt, also known as magnesium sulfate, is a common ingredient used in crystal growing solutions. It helps to create the conditions necessary for crystals to form and grow.
Here’s how to add Epsom salt to your solution:
- Measure the appropriate amount of Epsom salt based on the size of your container and the amount of solution you have. A general rule of thumb is to use about 2-3 tablespoons of Epsom salt per cup of water.
- Sprinkle the Epsom salt into the solution, making sure to dissolve it completely. You can use a spoon or your hands to mix it in.
- Stir the solution thoroughly to ensure that the Epsom salt is evenly distributed.
- Once the Epsom salt has dissolved, pour the solution into your container.
It’s important to note that Epsom salt is not the only ingredient you can use to make your crystal growing solution. Other ingredients such as water, borax, and washing soda can also be used to create the ideal conditions for crystal growth. Experimenting with different ingredients and ratios can help you find the perfect solution for growing your own crystals.
Step 3: Add Borax
In the third step of making your own crystal growing solution, you will need to add borax to the water and Epsom salt solution. Borax is a mineral that is commonly used in crystal growing, as it helps to lower the solubility of the salt in the water, allowing the crystals to form more easily.
To add borax to the solution, you will need to measure out the appropriate amount of borax based on the volume of water and Epsom salt solution that you have. A good starting point is to add 1/4 cup of borax for every 2 cups of water and Epsom salt solution. You can adjust the amount of borax based on the size and clarity of the crystals that you want to grow.
Once you have measured out the appropriate amount of borax, you can add it to the water and Epsom salt solution in a clean container. Stir the solution until the borax has dissolved completely, and then check the temperature of the solution to make sure it is within the appropriate range for crystal growth.
It is important to note that borax is not safe to consume, so it is important to keep the crystal growing solution out of reach of children and pets. Additionally, you should be careful when handling the solution, as it can cause skin irritation or burns if it comes into contact with your skin for an extended period of time.
With the addition of borax, your crystal growing solution is now complete and ready for the next step in the crystal growing process.
Step 4: Mix the Solution
Mixing the solution is a crucial step in making your own crystal growing solution. To begin, you will need to gather the necessary ingredients, which typically include water, Epsom salt, and borax. The exact ratio of ingredients will depend on the type of crystal you wish to grow, as well as the desired size and clarity of the crystal.
To ensure that the solution is properly mixed, it is important to use clean and sterile equipment. This can include a clean container, such as a glass jar or beaker, as well as a stirring rod or spoon. It is also important to use a measuring device, such as a scale or measuring cup, to ensure that the correct amount of each ingredient is used.
Once the ingredients have been gathered and the equipment has been cleaned and sterilized, the solution can be mixed by adding the Epsom salt and borax to the water. It is important to stir the solution thoroughly to ensure that all of the ingredients are evenly distributed. The solution should be clear and free of any sediment or other impurities.
Once the solution has been mixed, it can be stored in a clean and sterile container with a lid. It is important to label the container with the type of crystal being grown, as well as the date that the solution was mixed. This will help to ensure that the solution remains fresh and effective for an extended period of time.
In conclusion, mixing the solution is a critical step in the process of making your own crystal growing solution. By using clean and sterile equipment, and by following the proper ratios of ingredients, you can create a solution that will help to promote the growth of beautiful and high-quality crystals.
Step 5: Heat the Solution
Once you have mixed all the ingredients and combined them in the container, it’s time to heat the solution. This step is crucial to the crystallization process. Heating the solution helps to dissolve any impurities that may be present in the water, which can interfere with the crystal growth.
The ideal temperature for heating the solution is between 80-90 degrees Celsius. This temperature range is high enough to dissolve any impurities but not so high that it will boil the solution. It’s essential to use a thermometer to ensure that the temperature is within the recommended range.
Once the solution has reached the desired temperature, it’s time to carefully pour it into the container where the crystals will grow. Make sure to stir the solution thoroughly before pouring it into the container to ensure that the crystals will grow evenly.
It’s important to note that heating the solution can be dangerous if not done correctly. Always use caution when heating the solution and never leave it unattended. Additionally, it’s essential to use a container that is safe for heating and can withstand high temperatures.
Overall, heating the solution is a critical step in the crystal growing process. By carefully heating the solution to the ideal temperature and ensuring that it is thoroughly mixed, you can help ensure that your crystals grow to their full potential.
Step 6: Cool the Solution
Once you have prepared the crystal growing solution and mixed it thoroughly, it’s time to cool the solution to the desired temperature. This step is crucial as the temperature of the solution will affect the growth rate and quality of the crystals.
There are different methods to cool the solution, but one of the most effective ways is to use an ice bath. An ice bath is a bath of ice and water that is used to cool the solution quickly and efficiently. To create an ice bath, follow these steps:
- Fill a large container with ice and water. You can use a large bowl or a bucket for this purpose.
- Add enough ice to the container to completely cover the water. You can use regular ice cubes or crushed ice.
- Pour the crystal growing solution into a shallow dish or container.
- Place the shallow dish or container into the ice bath. Make sure the container is not touching the ice.
- Wait for the solution to cool down to the desired temperature. This can take anywhere from 30 minutes to an hour, depending on the size of the ice bath and the temperature of the room.
It’s important to note that the temperature of the crystal growing solution should be between 15-20°C (59-68°F) for optimal crystal growth. If the temperature is too high, the crystals may grow too quickly and be defective. If the temperature is too low, the crystals may not grow at all.
Once the solution has cooled to the desired temperature, it’s time to add the seed crystals and transfer the solution to the crystal growing container. Follow the previous steps to complete the crystal growing process.
In conclusion, cooling the crystal growing solution is an essential step in the DIY crystal growing process. Using an ice bath is a simple and effective way to cool the solution quickly and efficiently. Make sure to monitor the temperature of the solution to ensure optimal crystal growth.
Step 7: Test the pH Level
To ensure that your crystal growing solution has the right conditions for crystal growth, it’s important to test the pH level. The pH level measures the acidity or alkalinity of the solution, and it needs to be within a certain range for optimal crystal growth. Here’s how to test the pH level of your crystal growing solution:
- Purchase a pH test strip or a digital pH meter. A pH test strip is a simple and inexpensive way to test the pH level, while a digital pH meter is more accurate but also more expensive.
- Dip the pH test strip or place the digital pH meter into the crystal growing solution. Follow the manufacturer’s instructions for the specific test strip or meter you’re using.
- Compare the color of the pH test strip or read the digital pH meter display to the pH scale. The pH scale ranges from 0 to 14, with 0 being highly acidic, 7 being neutral, and 14 being highly alkaline.
- Adjust the pH level as needed. If the pH level is too low (acidic), you can add a small amount of sodium hydroxide (lye) to increase the pH level. If the pH level is too high (alkaline), you can add a small amount of hydrochloric acid to decrease the pH level. Be sure to follow safety precautions when handling these chemicals.
- Repeat the pH test every few days to ensure that the pH level stays within the desired range.
By testing and adjusting the pH level of your crystal growing solution, you can ensure that your crystals will grow properly and look their best.
How to Use the Crystal Growing Solution
Choosing the Right Container
When it comes to crystal growing, the container you choose is crucial. The container must be clean and sterile to prevent contamination of the solution. It is also important to choose a container with a flat bottom and straight sides to ensure that the crystals grow evenly.
Glass containers are a popular choice for crystal growing because they are non-reactive and can withstand high temperatures. However, plastic containers can also be used, as long as they are clean and sterile.
It is important to choose a container that is large enough to hold the solution and the crystals as they grow. The container should also have a lid to keep the solution contained and prevent evaporation.
In addition to the container, you will also need to choose a crystal growing kit, which typically includes a solution, a seed crystal, and a stand to suspend the container.
Once you have chosen the right container and crystal growing kit, you can begin the process of making your own crystal growing solution.
Placing the String or Pipe Cleaner
After preparing the crystal growing solution, the next step is to place the string or pipe cleaner in the solution. This is an important step as it helps to provide a surface for the crystals to grow on.
To place the string or pipe cleaner, follow these steps:
- Cut the string or pipe cleaner to the desired length. It is recommended to use a string or pipe cleaner that is at least 6 inches long.
- Hold the string or pipe cleaner over the crystal growing solution, making sure not to touch the solution with your hands.
- Slowly lower the string or pipe cleaner into the solution, being careful not to let it touch the bottom of the container.
- Hold the string or pipe cleaner in place for a few seconds to ensure that it is fully saturated with the solution.
- Remove the string or pipe cleaner from the solution and gently shake off any excess solution.
It is important to note that the string or pipe cleaner should be placed in the solution carefully to avoid disturbing the crystals that may have already formed. Once the string or pipe cleaner is in place, the crystals will begin to grow on it, and it is important to monitor the growth closely to ensure that the crystals are not disturbed.
Allowing the Crystals to Grow
After preparing the crystal growing solution, the next step is to allow the crystals to grow. This process involves setting up a container to hold the solution and the crystals, providing the necessary environment for crystal growth, and monitoring the progress of the crystals.
Setting Up the Container
To set up the container, you will need a clear glass or plastic container with a lid. The container should be large enough to hold the crystal growing solution and any additional materials that may be needed for the experiment.
Next, you will need to place a mesh screen or cloth over the top of the container to support the crystals as they grow. This will prevent the crystals from floating to the surface of the solution and will allow them to grow to their full potential.
Creating the Necessary Environment for Crystal Growth
The environment in which the crystals grow is crucial to the success of the experiment. The temperature, humidity, and light levels all play a role in the growth of the crystals.
The ideal temperature for crystal growth is between 15-20 degrees Celsius. If the temperature is too high or too low, it can affect the growth of the crystals. Humidity is also important, as crystals grow better in a humid environment. Finally, crystals require a source of light to grow, so it is important to place the container in a well-lit area.
Monitoring the Progress of the Crystals
Once the container is set up and the necessary environment is provided, it is important to monitor the progress of the crystals. Check the crystals regularly for signs of growth, such as the formation of new crystals or the expansion of existing ones.
It is also important to keep the container clean and free from debris to ensure the crystals grow to their full potential. If the crystals are not growing as expected, it may be necessary to adjust the temperature, humidity, or light levels.
Overall, allowing the crystals to grow is a critical step in the DIY crystal growing process. By following the proper steps and monitoring the progress of the crystals, you can create beautiful and unique crystals in the comfort of your own home.
Monitoring the Growth of the Crystals
Monitoring the growth of crystals is a crucial step in the crystal growing process. By keeping a close eye on the crystals, you can ensure that they are growing properly and make any necessary adjustments to the growing solution. Here are some tips for monitoring the growth of crystals:
- Check the crystals regularly: It’s important to check the crystals regularly to monitor their growth. This can be done daily or every other day, depending on the size of the crystals and the speed of growth.
- Observe changes in color and shape: As the crystals grow, they may change color or shape. These changes can indicate the growth of new crystals or the formation of larger crystals.
- Measure the crystals: To accurately measure the growth of the crystals, it’s important to use a ruler or measuring tape to measure the length, width, and height of the crystals. This can help you track the growth of the crystals over time.
- Take photos: Taking photos of the crystals can help you track their growth over time. You can also compare the photos to see how the crystals have changed.
- Adjust the growing solution as needed: If the crystals are not growing properly, you may need to adjust the growing solution. This can include adding more water or increasing the concentration of the solution.
By monitoring the growth of the crystals, you can ensure that they are growing properly and make any necessary adjustments to the growing solution. This can help you achieve the best possible results when growing crystals at home.
Tips and Tricks for Growing Crystals
Choosing the Right Location
Growing crystals at home can be a fun and educational activity for both children and adults. However, one of the most important factors in achieving success is choosing the right location for your crystal growing setup. The environment in which you place your crystal growing solution can greatly impact the rate of growth and the quality of the crystals that form. Here are some tips to help you choose the best location for your crystal growing project:
- Lighting: Crystals grow best in bright light, so choose a location that receives plenty of natural light. If you don’t have a sunny window, you can use a grow light to provide the necessary lighting.
- Temperature: The ideal temperature for crystal growth is between 60-70°F (15-21°C). Keep your crystal growing solution away from drafts and extremes of temperature, as this can slow down or even stop growth altogether.
- Ventilation: While you want to avoid drafts, you also need to ensure that your crystal growing solution is not in a completely sealed environment. Crystal growth requires the exchange of gases, so make sure that your setup is in a well-ventilated area.
- Container: The container you use for your crystal growing solution is also important. Clear glass or plastic containers allow you to observe the growth of the crystals more easily, but they can also become cloudy if the solution is not changed frequently enough. Dark-colored containers can absorb heat and slow down growth, so it’s best to use clear containers if possible.
- Distance from Heat Sources: Crystal growth can be slowed down or even stopped if the solution is too close to a heat source. Keep your crystal growing solution away from radiators, heaters, and other sources of heat.
By following these tips, you can choose the right location for your crystal growing setup and increase your chances of success.
Keeping the Solution Clean
Cleanliness is essential when growing crystals, as any impurities in the solution can affect the clarity and quality of the crystals. Here are some tips for keeping your solution clean:
- Use distilled water: Tap water contains impurities that can affect the crystal growth, so it’s best to use distilled water. You can purchase distilled water or make your own by boiling water and collecting the condensed steam.
- Sterilize your equipment: Before using any equipment, make sure to sterilize it thoroughly. You can use a mixture of water and bleach to sanitize your equipment.
- Keep your workspace clean: Keep your workspace clean and free of any debris or dust. This will help prevent contamination of your solution.
- Use a cover slip: When viewing your crystals under a microscope, use a cover slip to prevent dust or other contaminants from coming into contact with the crystals.
By following these tips, you can help ensure that your crystal growing solution stays clean and free of impurities, resulting in high-quality crystals.
Using Different Types of Salt
One of the key factors in growing crystals is the type of salt used. Different types of salt have different properties that can affect the growth and appearance of the crystals. Here are some tips on using different types of salt for crystal growing:
- Epsom Salt: Epsom salt, also known as magnesium sulfate, is a popular choice for crystal growing. It is relatively inexpensive and easy to find, and it produces beautiful, colorful crystals. To use Epsom salt, simply dissolve a few tablespoons of salt in water and add it to your crystal growing solution.
- Rock Salt: Rock salt, also known as halite, is another popular choice for crystal growing. It is a natural form of salt that is mined from the earth. Rock salt tends to produce clear, cube-shaped crystals. To use rock salt, dissolve a few tablespoons of salt in water and add it to your crystal growing solution.
- Sea Salt: Sea salt is harvested from the ocean and is known for its unique flavor and mineral content. It can produce a variety of crystal shapes and colors, depending on the type of sea salt used. To use sea salt, dissolve a few tablespoons of salt in water and add it to your crystal growing solution.
- Himalayan Pink Salt: Himalayan pink salt is a type of rock salt that is mined from the Himalayan mountains. It is known for its pink color and unique mineral content. It can produce beautiful, colorful crystals. To use Himalayan pink salt, dissolve a few tablespoons of salt in water and add it to your crystal growing solution.
It’s important to note that not all types of salt are suitable for crystal growing. Avoid using table salt, as it contains additives that can interfere with the crystal growth process. Additionally, it’s best to use pure, fine-grained salt for crystal growing, as it dissolves more easily in water.
Experimenting with different types of salt can be a fun and rewarding part of the crystal growing process. By trying out different types of salt, you can create unique and beautiful crystals that are perfect for decoration or experimentation.
Experimenting with Different Additives
One of the most exciting aspects of crystal growing is the ability to experiment with different additives to create unique and interesting crystal formations. Here are some tips for experimenting with different additives:
- Start with a basic crystal growing solution, such as Epsom salt or borax, and gradually add small amounts of different additives to see how they affect the crystal growth.
- Experiment with different types of additives, such as food coloring, glitter, or iron oxide, to see how they change the color, shape, and size of the crystals.
- Keep a record of your experiments, including the type and amount of additives used, the date, and any observations or results. This will help you to track your progress and make adjustments to your crystal growing solution as needed.
- Be patient and allow enough time for the crystals to grow to their full potential. Some crystals may take several weeks or even months to form, so it’s important to give them enough time to grow.
- Have fun and be creative! Crystal growing is a great way to explore science and experiment with different materials and techniques. Don’t be afraid to try new things and see what works best for you.
Frequently Asked Questions
Q: How long does it take for crystals to grow?
One of the most common questions people have when it comes to DIY crystal growing is how long it takes for the crystals to form. The answer to this question can vary depending on several factors, such as the type of crystal you are trying to grow, the size of the crystal, and the conditions in which you are growing the crystal.
In general, it can take anywhere from a few days to several weeks for crystals to grow. Some crystals, such as quartz, can grow relatively quickly in just a few days, while others, like amethyst, may take several weeks to form. The size of the crystal you are trying to grow can also affect the growth time, with larger crystals taking longer to form than smaller ones.
It’s important to note that the growth time can also be influenced by the conditions in which you are growing the crystal. For example, if the temperature or humidity levels are not optimal, it may slow down the growth process. Similarly, if the solution you are using to grow the crystal is not saturated enough, it can also prolong the growth time.
Overall, the growth time for crystals can vary depending on several factors, but with patience and the right conditions, you can grow beautiful crystals in the comfort of your own home.
Q: Can I use other types of salt instead of Epsom salt?
When it comes to crystal growing, Epsom salt is a popular choice due to its affordability and availability. However, many people wonder if they can use other types of salt instead of Epsom salt. The answer is yes, you can use other types of salt for crystal growing, but it’s important to note that not all salts are created equal.
Some salts, such as table salt, may not produce the same results as Epsom salt. This is because table salt is iodized, which can interfere with the crystal growth process. Additionally, some salts may be too soluble or insoluble in water, which can affect the clarity and quality of the crystals.
If you want to use a different type of salt, it’s important to do your research to ensure that it’s suitable for crystal growing. Some popular alternatives to Epsom salt include:
- Rock salt: This type of salt is commonly used for cooking and can produce beautiful, clear crystals.
- Sea salt: Sea salt is naturally harvested from the ocean and can produce stunning, colorful crystals.
- Himalayan pink salt: This type of salt is mined from the Himalayan mountains and can produce beautiful, pink crystals.
When using a different type of salt, it’s important to follow the same steps as you would with Epsom salt. This includes dissolving the salt in water and allowing it to cool to room temperature before pouring it into your mold. Additionally, be sure to use a clean and sterile container and mold to prevent contamination and ensure the best possible results.
Q: Can I reuse the crystal growing solution?
Reusing the crystal growing solution can be an attractive option to save time and resources. However, there are some factors to consider before deciding to reuse the solution.
- Effectiveness: The effectiveness of the solution decreases with each use, which may result in smaller or less perfect crystals. The solution’s concentration and quality degrade with time, and the solution may become contaminated with impurities, which can negatively impact the crystal growth.
- Contamination: Crystal growing solutions can become contaminated with impurities, such as dirt, dust, or other substances, which can affect the quality and size of the crystals. Therefore, it is important to check the solution for impurities before using it again.
- Storage: Reusing the solution requires proper storage. If the solution is not stored correctly, it can evaporate or become contaminated, which can affect the crystal growth. Therefore, it is important to store the solution in a cool, dry place, away from direct sunlight.
- Cost: Reusing the solution may seem like a cost-effective option, but it may end up costing more in the long run. If the solution is not properly stored or becomes contaminated, it may need to be replaced more frequently, which can increase the overall cost.
Overall, while it is possible to reuse the crystal growing solution, it is important to carefully consider the factors mentioned above before making a decision. It may be more cost-effective and produce better results to make a new solution each time.
Q: What is the best way to clean the crystals?
When it comes to cleaning crystals, there are a few different methods that you can use depending on the type of crystal and the level of cleaning required. Here are some tips for cleaning your crystals:
- Use a soft cloth or brush: One of the easiest ways to clean your crystals is to use a soft cloth or brush to gently wipe away any dirt or debris. Avoid using harsh chemicals or abrasive materials that could damage the surface of the crystal.
- Soak in water: If your crystal has been exposed to dust or other debris, you may need to soak it in water to clean it thoroughly. Use a mild soap or detergent, and avoid submerging the crystal completely to prevent it from getting damaged.
- Use a solution of water and vinegar: A solution of water and vinegar can be a gentle and effective way to clean your crystals. Mix equal parts water and vinegar, and use a soft cloth or brush to wipe away any dirt or debris. Be sure to rinse the crystal thoroughly with clean water afterwards.
- Avoid exposing crystals to extreme temperatures: Extreme temperatures can cause crystals to crack or lose their luster. Avoid exposing your crystals to direct sunlight or placing them near heating or cooling vents.
Overall, the key to cleaning crystals is to be gentle and avoid using harsh chemicals or abrasive materials that could damage the surface of the crystal. With proper care and cleaning, your crystals can last for many years to come.
FAQs
1. What is a crystal growing solution?
A crystal growing solution is a liquid mixture that contains a solute, usually a salt or a supersaturated solution, which can be used to grow crystals. The solution is often made by dissolving a solute in water or another solvent, and then allowing the solution to evaporate or cool to encourage crystal formation.
2. What is the process of making a crystal growing solution?
The process of making a crystal growing solution involves dissolving a solute in a solvent to create a supersaturated solution, and then allowing the solution to cool or evaporate to encourage crystal formation. The specific solute and solvent used will depend on the type of crystal being grown, as well as the desired size and shape of the crystals.
3. What kind of solute should I use to make a crystal growing solution?
The type of solute used to make a crystal growing solution will depend on the type of crystal being grown. Common solutes used for crystal growing include salt, sucrose, and other sugars. It is important to use a solute that is soluble in the chosen solvent, and that will produce crystals of the desired size and shape.
4. What kind of solvent should I use to make a crystal growing solution?
The type of solvent used to make a crystal growing solution will depend on the type of solute being used, as well as the desired size and shape of the crystals. Water is a common solvent for crystal growing, but other solvents such as acetone or methanol may also be used. It is important to use a solvent that is compatible with the chosen solute and that will not interfere with the crystal growth process.
5. How do I make a supersaturated solution for crystal growing?
To make a supersaturated solution for crystal growing, you will need to dissolve a high concentration of solute in the solvent. This can be done by adding a small amount of solute to a small amount of solvent, and then slowly adding more solute while stirring the mixture. It is important to use a gentle stirring method to avoid introducing air bubbles into the solution, which can interfere with crystal growth. Once the solute is fully dissolved, the solution can be cooled or allowed to evaporate to encourage crystal formation.
6. How do I encourage crystal growth in my crystal growing solution?
There are several ways to encourage crystal growth in a crystal growing solution. One common method is to cool the solution to a temperature below the solubility point of the solute, which will cause the solute to precipitate out of solution as crystals. Another method is to allow the solution to evaporate, which will increase the concentration of solute and encourage crystal formation. Alternatively, you can use a seed crystal to encourage the growth of additional crystals in the solution.
7. How long does it take for crystals to grow in a crystal growing solution?
The time it takes for crystals to grow in a crystal growing solution will depend on several factors, including the size and shape of the crystals, the concentration of solute in the solution, and the temperature and environment in which the solution is kept. In general, it can take several days to several weeks for crystals to grow to a significant size.
8. Can I reuse a crystal growing solution?
It is generally not recommended to reuse a crystal growing solution, as the solute may become depleted or contaminated over time, which can interfere with crystal growth. It is best to create a new solution for each crystal growing experiment.